

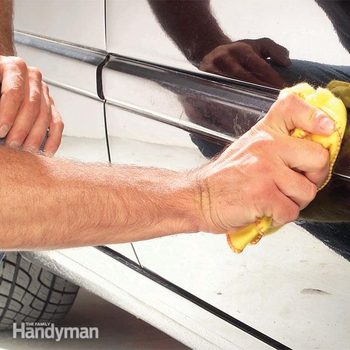
How To Clean Auto Rubber And Plastic Molding
Machine Body Side Molding Fix
Updated: Nov. 28, 2018
Reattach loose side molding – before it blows away
Reattach rubber or vinyl body side molding on your motorcar earlier it comes loose. Automobile trim on tardily model cars is notorious for peeling off—here's how to reattach it earlier it ends up on the highway.
You might also like: TBD
- Time
- Complexity
- Cost
- A total day
- Beginner
- Less than $20
Torso side molding fix
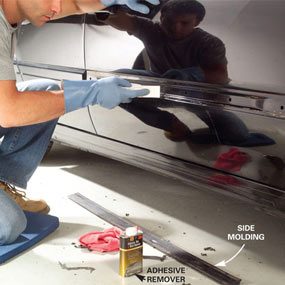
Photo 1: Clean former adhesive off the car
Saturate a cotton rag with adhesive remover and clean the old adhesive off the door. Do this in a well-ventilated area, preferably outside on the driveway. Scrape the old adhesive with a plastic putty knife and continue applying remover and wiping until the old agglutinative is gone. So further clean the surface with denatured booze to remove residue. Don't use abrasives. What you want is a smooth, blotch-complimentary surface for the mounting tape.
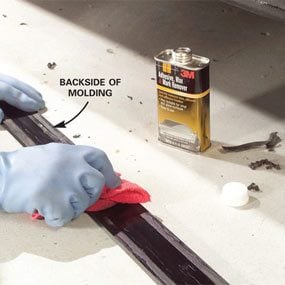
Photograph ii: Clean the molding
Thoroughly clean the back side of the trunk side molding past saturating it with agglutinative remover and rubbing and scraping the old agglutinative abroad. This tin be a stubborn job, just take your time and stick with it. When the surface is complimentary of adhesive, wipe information technology with a clean textile dampened with denatured alcohol.
Materials
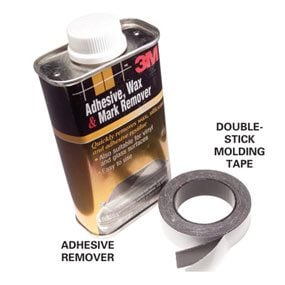
Adhesive remover and double-stick molding tape are the simply supplies yous need for this repair.
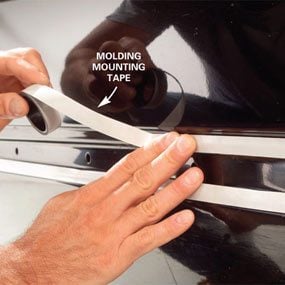
Photo 3: Apply molding tape
Apply the double-stick molding tape to the areas that will contact the molding. Press the tape firmly along the length. For wide trim, utilise 2 strips equally shown.
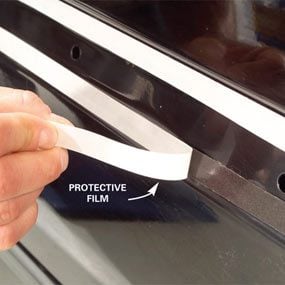
Photo 4: Expose the viscous surface
Peel the protective film off the tape to expose the sticky surface. Be conscientious not to impact it with your fingers or let whatsoever debris become on the tape.

Photo 5: Employ the body side molding
Carefully position the torso side molding, starting at 1 stop, and so slowly push it onto the tape. The tape grabs firmly, so take your time. Once the body side molding is in place, push it firmly with a rag. Utilise a back-and-along motion across the molding to bail the unabridged length.
Maybe you lot're ane of those people driving down the route with your rubber or vinyl side molding flapping in the wind. Well, for less than $20, you tin fix this problem once and for all before your expensive molding strip ends up in the back of the highway cleanup crew's truck. At the car parts store, pick up adhesive remover and molding tape. And then all you lot'll need is denatured booze, a plastic putty knife and clean rags.
Required Tools for this Project
Have the necessary tools for this DIY projection lined up before you get-go—you'll save time and frustration.
You'll also need a plastic putty knife
Required Materials for this Project
Avoid last-minute shopping trips past having all your materials set ahead of fourth dimension. Here's a listing.
Originally Published: November 28, 2018

Source: https://www.familyhandyman.com/project/auto-body-side-molding-fix/
Posted by: dixonbeepon.blogspot.com
0 Response to "How To Clean Auto Rubber And Plastic Molding"
Post a Comment